What I Learned When I Took a Professional Makeup Lesson


I think all of us want to do a better job of makeup application, don’t you? I’ve had the blessing of having Bebe Tran, one of Dallas’ most well-known makeup artists, do my makeup for a few of my photoshoots, and I always pepper her with questions during our time together! The last time we were together, she suggested that we do a one-on-one makeup lesson to help me feel more confident when I’m doing my own makeup. I loved that idea, and I’m so excited to share the experience with you today! I learned so much, and you’re going to learn a bunch too. I promise!
I filmed our makeup lesson, and you can watch the video on my YouTube Channel. While you’re there, be sure to subscribe because I’m planning to do more videos (on a wide variety of topics) this year. If you subscribe, you’ll be notified when I post a new one.

Bebe Tran is the owner of B-Lashed Beauty & Bridal Bar, one of the most well-respected lash and makeup salons in the Dallas area. She and her staff provide services ranging from lash extensions and lifts to microblading, facials, and hair and makeup for any occasion. Thanks to this lash growth serum, I don’t need extensions, but I do go to Bebe for brow microblading, and I’ve had a few lash lifts. You can read a post about it HERE (complete with creepy too-close photos of my eyes!).
My Makeup Lesson: How it Worked


The Midlife Makeup
Mistakes You May Be Making
Plus, How to Fix Them!
Already a subscriber?
Enter your email—you won’t be
subscribed twice!
Bebe told me to bring my everyday makeup favorites and come with my normal makeup done. She checked it out and then had me remove my makeup. One of my favorite things about her is that she gets so excited to make women feel beautiful, and she believes that true beauty comes from within! She always tells me I’m beautiful before we even start!
Going into my lesson, I was worried that I was going to get in trouble for not using fancy sponges or tools to apply my makeup and that I use my hands whenever possible. To my surprise, she was okay with that, although she did get on me about going too fast and not using upward, gentle pats and strokes as I applied!
When I got to the salon, she had me lay out my products in the order that I use them. I would be doing my own makeup. She would be instructing, correcting, and teaching. The first thing she had me do once I was done laying everything out was to remove my makeup.

My Makeup Lesson: Skin Care
Bebe believes that no amount of makeup can cover up bad skin. I totally agree!
For information on my daytime and nighttime skincare routines, check out THIS post.
My Makeup Lesson: Products & Application Tips


My Makeup Products
Supergoop Unseen Sunscreen (on face) | Supergoop Play Sunscreen (on neck) | Laura Geller Spackle Skin Perfecting Primer (Diamond) | IT Cosmetics (US)CC+ Cream Oil-Free Matte Full-Coverage Foundation with SPF 40 | Make Up For Ever HD Skin Color Corrector | Make Up For Ever HD Skin Full Cover Concealer (1 shade lighter than your foundation) | Perricone MD No Makeup Eyeshadow (or Eyeshadow Primer) | Laura Geller Beauty The Best of the Best Baked Face Palette | L’Oreal Paris Brow Stylist Definer | Benefit Cosmetics Gimme Brow+ Tinted Volumizing Eyebrow Gel | Maybelline Lash Sensational Mascara | Laura Geller Modern Classic Waterproof Lip Liner | Laura Geller Jelly Balm Hydrating Lip Color | Cover Girl Outlast All-Day Lip Color
Primer
My Product: I use Laura Geller Spackle Skin Perfecting Primer (Diamond). The iconic Spackle line of primers from Laura Geller is full of beauty award-winners, and I like that all of the products from the brand are formulated for mature skin. There are seven formulas to choose from, depending on your preference. You can see them all HERE.
Bebe’s Product Recommendations: When it comes to primers, Bebe recommends Benefit’s The Porefessional Face Primer for people with larger pores. A budget-conscious alternative is NYX Pore Filler. I don’t have large pores everywhere, and she thinks Hourglass Veil Mineral Primer is the “Rolls Royce” of primers.
APPLICATION TIPS: The first thing Bebe told me was that I needed to dot the primer all over my face before rubbing it in using a circular motion. That would ensure an even application. She encouraged me to concentrate my application in the Tzone, focusing on these five areas:
- Forehead
- Nose
- Chin
- Cheeks
- Eyes
She told me to slow down (I heard this a lot during my lesson! 🤣) and use a gentle, upward, circular motion. When I got to the eye area, she told me to gently pat the product in the undereye area, moving from out to in, using my ring finger. Next, I needed to close my eyes and (again using my ring finger) work the primer from the inner eye to the outer eyelid.
Color Corrector/Concealer
This was an area of major mistakes for me! First of all, I was applying concealer only without color correction, and I was doing it after foundation, not before. Also, I was applying it over my entire undereye area instead of towards the inner side, where I needed coverage for my purplish dark circles.
My Product: I use HD Skin Smooth & Blur Undetectable Under Eye Concealer, which is the concealer Bebe told me to use several years ago, but I wasn’t using a color corrector first. Bebe explained that as we age, the skin under our eyes gets thinner, which can cause dark circles in that area, even if we didn’t have them at a younger age.
A few days after my makeup lesson, Bebe met me at the Sephora near her salon, and we did a personal shopping session. This was hugely helpful! She helped me select the exact shades of color corrector, concealer, and matte foundation in the brands she likes. We looked for a self-setting color corrector and concealer that immediately conforms and sets to the skin. (More on Bebe’s Personal Shopping service at the bottom of this post.)
To neutralize under-eye discoloration for my specific skin tone, she chose HD Skin Smooth & Blur Undetectable Under Eye Concealer in 3.3(R) Pecan. For my concealer, she chose the same product in 2.2(N) – Macadamia.
APPLICATION TIPS: (For both color corrector and concealer.)
- Use the triangle method. Draw an upside-down triangle with your color corrector/concealer at the inner portion of each under-eye area. The triangle’s base should align with the lower lash line, and the tip should extend downwards towards your cheek, covering the discolored area. (It’s not necessary to take this all the way out toward the outer corner of your eye unless you have discoloration all the way out there.)
- Start at the inner eye and gently use your ring finger, pat the product in, and work your way out. (Patting sets it in with a much smoother application, and you’ll require less product.)
- The ring finger is the weakest of all the fingers, so it will apply the least amount of pressure and pull in that sensitive area.
- Repeat with your concealer, still patting, but this time extending it all the way out toward the outer corner of the eye.
- Once you reach the outer eye, gently swipe toward the temple to blend.
- Remember: less (product) is more! You can always layer for more coverage.
- The mirror is your BFF, so be sure to look in the mirror as you do this. The mirror doesn’t lie!

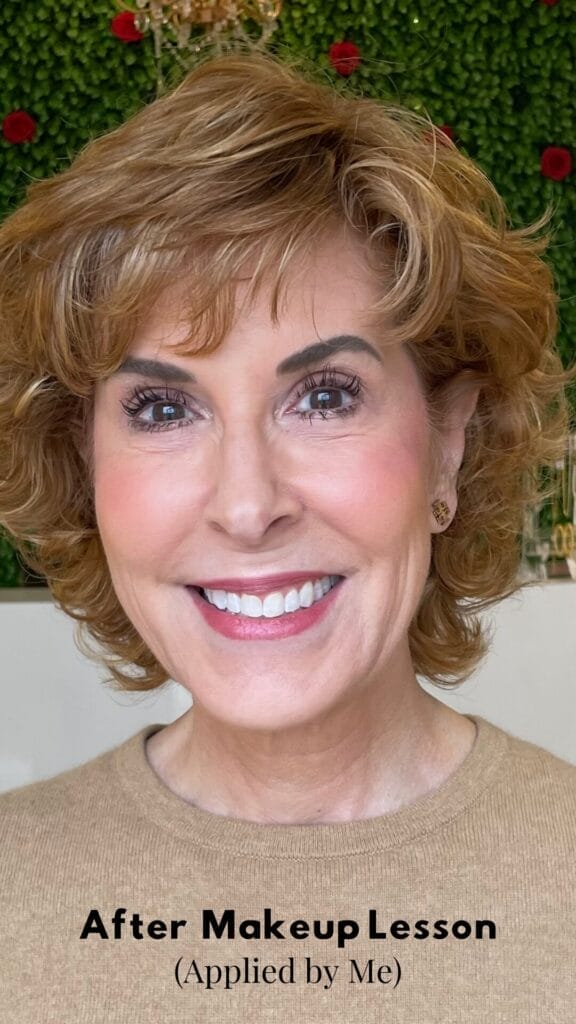
LEFT PHOTO: Note the discoloration at the inner corner of my under eye (without color corrector but with concealer).
RIGHT PHOTO: Notice the entire under-eye area is lighter (with color corrector followed by concealer).
You can really see the difference above in my before photo—when I did my own makeup WITHOUT a color corrector—and my after photo WITH a color corrector.
Foundation
My Product: I’ve been faithful to It Cosmetics CC+ Cream Full Coverage Color Correcting Foundation with SPF 50 for years! It contains a brightening color corrector, a hydrating anti-aging serum, uses zinc oxide and titanium dioxide for SPF 50+, and it’s full coverage. Lately, I’ve read that a more matte foundation look is trending (See Taylor Swift’s makeup look at the 2024 Golden Globes.) So I decided to try IT Cosmetics CC+ Cream Oil-Free Matte with SPF 40.
Bebe’s Product Recommendations: Bebe is not a big fan of my foundation (!), so when we did our personal shopping trip, I decided to try her favorite instead, and she helped me select the right shade for my skin tone. 😊 Bebe’s favorite foundation is Dior Forever Skin Glow Foundation (SPF 15). Since I’m using matte foundation right now, she recommended Dior Forever Matte Foundation (SPF 15).
APPLICATION TIPS: Similar to primer, dot the foundation all over your face for even application and then apply with upward circular strokes. Go slowly and look in the mirror!
My Makeup Lesson: Brushes
First of all, I got in trouble because my brushes were dirty! 🫣😂 Bebe recommends cleaning them once a week with Ecotools Makeup Brush Cleansing Shampoo. She also told me that the brushes I was using for my highlighter, blush, and contour were too big and firm. When we went shopping, she picked out some better ones for me! She likes the Sephora Collection brushes and recommends #98 for applying highlighter and #56 for applying contour and blush. (She said to use one side of the brush for contour and one side for blush and then blend with the middle of the brush.)
My Makeup Lesson: Eyes
My Products: I always apply an eyelid primer to prevent my eye shadow from creasing. The one I use is Perricone MD No Eyeshadow Eyeshadow. Sometimes I even use it alone instead of eye shadow! Bebe said that was fine, but I could use concealer instead! (One less product! 🎉 I’m for that!)
For my eye shadow, I use the three shadows in Laura Geller’s The Best of the Best Baked Face Palette. There’s one for the full lid (Sunstone), one for highlighting the brow bone (Oyster), and one for the crease (Almond). I love having them all in one place because it keeps it simple.🙌 For application, Bebe recommends Sephora Collection brushes #14 or #26.
Several years ago, Bebe recommended an amethyst/plum eyeliner pencil to make my brown eyes pop! If you don’t have brown eyes, she recommends matching your eye color. I use Xtreme Lashes Eyeliner Pencil in Plum (Amazon!), which Bebe likes. I love this brand because it’s long-lasting and soft, and there are 12 Vitamin E-enriched shades.
Bebe says colored eyeliner pencils create a softer, gentler look than a black pencil or gel liner. She also recommends Lancôme Drama Liqui-Pencil Longwear Eyeliners. I use an eyeliner blending brush for smudging, which Bebe is all for!
I told Bebe that I’ve started using Maybelline Tatoo Studio Gel Pencil Liner in Rose Quartz along the outer half of my bottom lashes to brighten up my eyes. She thought that was a great idea!
Bebe’s Product Recommendations: On her clients, Bebe uses Dior eyeshadows. She recommends Diorshow 5 Couleurs Couture Eyeshadow Palette. She also likes Bobbi Brown eyeshadow.
APPLICATION TIPS: Apply shadow before eyeliner! She suggests using the same brush to apply all three eyeshadow colors, applying from lightest to darkest. When it comes to eyeliner, Bebe says you don’t need to have a sharp point on your eye pencils. In fact, a blunter tip will keep you from scratching the delicate skin and also make blending easier.
My Makeup Lesson: Face
I highlight and contour every day! As I’ve gotten older and things have started to droop, I find it’s a great way to boost things up!
Contour
My Product: I use the bronzer in Laura Geller’s The Best of the Best Baked Face Palette (in Tahitian Glow). It’s also sold separately HERE.
Bebe’s Product Recommendation: Bebe likes Benefit Cosmetics Hoola Bronzer. It comes in four shades.
Highlighter
My Product: I use the highlighters in Laura Geller’s The Best of the Best Baked Face Palette. There are two options: French Vanilla and Portofino. French Vanilla gives a subtle, natural glow without sparkle. Portofino has a little bit of sparkle. These two are sold as a duo HERE. I tend to use one or the other, depending on my mood!
Bebe’s Product Recommendation: Bebe likes Dior Forever Couture Luminizer Highlighter Powder. She likes the pigments Dior uses for both highlighter and blush.
Blush
My Product: I’m currently using the blush in Laura Geller’s The Best of the Best Baked Face Palette (in Pink Buttercream). It’s a universally-flattering neutral pink and it’s sold separately HERE.
Bebe’s Product Recommendation: Bebe likes Dior Rouge blush because it’s highly pigmented, which gives it staying power!
APPLICATION TIPS: Bebe says to apply contour first, followed by blush and then highlighter. For contour placement, draw an imaginary line from your mid-ear to the corner of your mouth and extend the contour about halfway down that imaginary line. No contour color should go below that imaginary line (or your face will look droopy). With regards to highlighter, she cautions against using a highlighter with shimmer, as it can emphasize and settle into wrinkles.
NOTE: You’ll notice in the video that because I have a heart-shaped face, Bebe had me start my imaginary line for contour at my upper ear rather than my mid-ear. This is the wonderful thing about a personalized makeup lesson—it’s truly personalized!
When it comes to blush, Bebe says to use your cheekbone as your guide. I told Bebe that when I was younger, I used to smile, apply my blush on the apple of my cheeks, and go! As I’ve gotten older, the apple of my cheek has fallen, so now it’s too low if I do that! 😂 Bebe agreed and told me not to smile when I apply. Instead, she said to place the application brush where the apple of my cheek is (without smiling) and then smile, pat it in, and work it up and out. She said to apply it higher than I might initially think. (The patting packs the product more, preventing it from fading out during the day.)
After that, Bebe says to apply highlighter by patting it along the very top of your cheekbones, starting about mid-eye. Continue up onto your temples and to the sides of your forehead (for a little mini-facelift!). Then pop a little at the bow of your upper lip to make it look fuller.
When finished, Bebe says to use your hands to blend your highlighter, contour, and blush.
FOR A MINI FACELIFT – (Bebe’s words, not mine!) Place a dot of the Champagne eyeshadow in three places:
- In the very center of your upper lash line.
- Just under the arch of your brow.
- Just above the arch of your brow.
Mascara
My Products: Thanks to GrandeLASH – MD Lash Enhancing Serum, my lashes are really long! I’ve used it for years. Bebe was even impressed! As far as mascara goes, I’ve tried SO many, but in the end, I keep coming back to Maybelline Lash Sensational Washable Mascara. It lasts through my day (and even my naps!) and washes off easily at night.
After I apply mascara, I tap ¼ of a Clean & Clear Oil Absorbing Sheet under my eye to absorb oil and prevent mascara smears. I taught Bebe this trick, and she was impressed! (The idea that I taught my makeup artist something made me ridiculously happy!)
I curl my lashes after applying mascara using GrandeLASH-LIFT Heated Lash Curler by Grande Cosmetics. This rechargeable, heated lash curler applies just the right amount of heat! I use it at the base of my lashes to lift them. No crimping, pinching, or lash loss!
Bebe’s Product Recommendations: Bebe is a fan of my mascara too!
APPLICATION TIPS: Bebe recommends using 2-3 coats of mascara. For the tiny lashes on the inner part of your eyes, she says to turn the brush vertically and use the tip to coat. For the top lashes, she suggests fanning out the outer lashes to help make your eyes look larger and wider.
My Makeup Lesson: Brows
My Products: I use the same growth serum on my brows that I use on my lashes, and I think it’s helped with fullness! I use L’Oreal Brow Stylist Definer pencil to fill in sparse places and then finish with Benefit’s Gimme Brow+ Tinted Volumizing Eyebrow Gel to define and enhance my brows. It uses a mascara-like wand to coat my brows, and it has tiny microfibers that create natural-looking fullness.
Bebe’s Product Recommendations: When it comes to eyebrow pencils, Bebe likes Anastasia Brow Wiz Ultra-Slim Precision Brow Pencil. She follows it up with Benefit’s Gimme Brow+ Tinted Volumizing Eyebrow Gel, which is what I use.
APPLICATION TIPS: Fill in the sparse areas with your brow pencil and follow with a tinted eyebrow gel, brushing the brow hairs upward. You don’t want them pointing straight up like a forest, but you do want them pointing in an upward direction to help them look fuller.
My Makeup Lesson: Lips
My Products: I like long-wearing lipstick, but it can dry my lips (especially in the winter)! My favorite is COVERGIRL Outlast All-Day Lip Color. Since it’s winter right now, I’ve been using Laura Geller’s Jelly Balm Hydrating Lip Color because it’s a more moisturizing lipstick.
I’ve also recently started using a lip pencil because I find that moisturizing lipsticks can tend to run into the lines around my mouth if I don’t. (Bebe agreed with this, BTW!) I use Laura Geller’s Modern Classic Waterproof Lip Liner.
Bebe’s Product Recommendations: For lining lips, Bebe recommends Make Up For Ever Aqua Lip Waterproof Lipliner Pencils. For lipstick, Bebe likes Rouge Dior Refillable Lipstick. It’s refillable, long-wearing, and hydrating.
APPLICATION TIPS: Select a lip liner that is similar to your lipstick color and line the lip at the outer edge of the lip line. Line at the upper edge of the rim of your lips, but not above or below the lip line, because it doesn’t look natural. After lining, fill in the lip with the lip liner. This will help your lipstick last longer. Once you’re ready for lipstick, dab it at the center of the lip and pat the lips together to spread it. (By not over-applying it, you will prevent a hydrating lipstick from bleeding into the creases around your lips.)

Many thanks to Bebe and her staff at B-Lashed Beauty & Bridal Bar for my makeup lesson and for helping me film! I learned so much, and I hope you did too!
Bebe’s Services
Want to learn as much as I did? Bebe offers several services that can help!
- Makeup Lesson – (These can be done in person at her salon in Dallas or over Zoom if you live outside the Dallas area.) Bebe typically charges $200 per hour, but she has generously offered Empty Nest Blessed followers a 50% discount! It’s a one-time lesson, but what you learn will benefit you for years to come!
- Personal Shopping & Color Matching – Bebe will meet you at Sephora to help you select the best makeup shades and brushes for your skin tone. Bebe typically charges $175 for a 30-minute consultation, but she has generously offered Empty Nest Blessed followers a 50% discount! (Additional travel charges may apply based on location.) Again, it’s a one-time shopping session, but once you’ve got your color matches, you’re set for years to come!
- Combination Makeup Lesson & Personal Shopping – Bebe offers a one-hour makeup lesson plus a 30-minute personal shopping session for $375, but she is generously offering that combination service for Empty Nest Blessed readers for 50% off!
THIS IS AN AMAZING DEAL!
Be sure to mention Empty Nest Blessed when you call to book (817-881-2009)!
Be sure to head to the Empty Nest Blessed YouTube Channel to watch the video of our makeup lesson! You’ll learn even more!
For your convenience, I’ve put together a boutique below of every single product mentioned in the post or the video. Click on any item for more information!














Suzy;
Makeup is so much fun; the older I get, the more I appreciate it. I was not into makeup when I was younger. I recently learned the benefits of primer this past weekend, ironically at a makeover. I don’t know how I feel about my lashes, but my brows are a problem area, so I may invest in that lash serum.
Thanks for all you do. I really appreciated this post.
Nylse,
Aw, you’re so welcome! I’m thrilled you found it helpful! YES! Primer makes such a difference!
I do think you would like the lash serum for your brows. It takes consistent use over several weeks to see a difference, but you will!
Thanks so much for your comment!
xoxo
Suzy
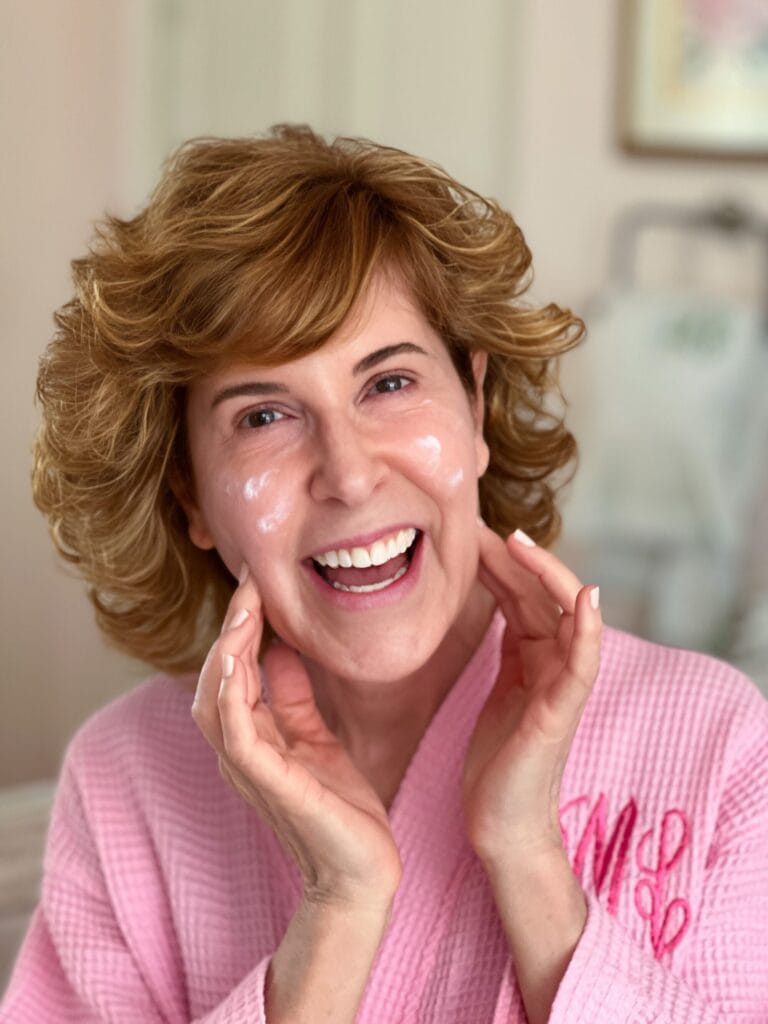
Suzy, It was very brave of you to post a close up picture of yourself with out make up. Oh my goodness if I did that it would scare you! You are beautiful without anything on.
You don’t even need to wear make up.
Juliet,
Thank you, but no bravery was needed! 😂 We all look better with makeup than without! I always do my best to be real and authentic for you all, and I’m a big believer in good skincare!
You were so sweet to take the time to leave a comment! Thank you!
xoxo
Suzy
Suzy, you look just as great with your own makeup! Thanks for sharing tips with us from a pro!
Cathy,
Well, thank you! You are just the sweetest! Hugs!
xoxo
Suzy
Your journey through a professional makeup lesson was incredibly inspiring to read! Your detailed insights and reflections provide valuable guidance for aspiring makeup enthusiasts. It’s evident that you’ve gained invaluable knowledge and skills, and your willingness to share these experiences is truly commendable. Thank you for shedding light on the transformative power of learning and self-discovery in the world of makeup artistry!
Krisha,
Thank you so much for reading this post and for your kind comment! It was a fabulous experience!
xoxo
Suzy