Five Midlife Makeup Mistakes You May Be Making (And How to Fix Them)


As women over fifty, are there midlife makeup mistakes you may be making? Our makeup needs are not what they were when we were in our twenties (or even thirties)! As midlife women, our skin is drier, there are more lines on our faces, and there may be uneven tone and texture from aging and sun damage.
Thankfully, there’s makeup! Recently, I talked about what happens to our lips as we age and what we can do about it, and today, I’m sharing five midlife makeup mistakes that I was making. (And I suspect you may be making them too!) I’m also linking to all of my favorite products. (Click the links or images for details.)
1. Skipping Primer
This video originally appeared on my YouTube Channel. I’d love it if you’d follow me there!
When you were younger, you didn’t need a makeup primer. You may not have even used foundation! Times have changed, my friends! Makeup primer acts as a base for your makeup. It fills in lines, allows makeup to go on smoother, and makes it last longer. I use mine all over my face before applying my foundation. I’ve tried lots of them over the years, but I keep coming back to Hourglass Veil Mineral Primer! It’s the one my makeup artist friend Bebe Tran says is the best!

The Midlife Makeup
Mistakes You May Be Making
Plus, How to Fix Them!
Already a subscriber?
Enter your email—you won’t be
subscribed twice!
The price is the same no matter where you shop, so pick your favorite place from the list below. (Note that if you’ve never tried it before, it’s available in a .031 oz. size at all of these brands, which is perfect for sampling.)
If you’re a fan of “clean” makeup, you’ll want to try my other favorite primer: Tula’s Face Filter Blurring & Moisturizing Primer. It’s made with probiotics & superfoods like licorice & chia seeds to balance & nourish the skin. It’s buildable, and it has special “glow particles” that create the look of sun-kissed, radiant skin. It’s a good one if you really want an allover, subtle glow!
To hide discoloration and prevent eyeshadow creasing, the delicate upper eyelid area needs its own primer. I use Perricone MD No Makeup Eyeshadow. It doesn’t crease! It’s perfect under eyeshadow or alone. I wear it alone a lot! It makes your lashes pop!
2. Not Using a Foundation Brush
I’ll be honest; I’m kind of lazy when it comes to applying my makeup! For years, I just used my hands! But after increasing frustration with my inability to produce a smooth, airbrushed-type finish, I started watching some tutorials. It turned out my problem was easily fixable! I needed to use a foundation brush! I use the Airbrush Dual-Ended Flawless Complexion Concealer & Foundation Brush by ItCosmetics. The smaller end is for the area around your eyes and other hard-to-reach areas, while the larger, fluffy end is for buffing and blending. When I use this brush, I get a natural-looking, airbrushed finish that I love!
- At Amazon
- At ItCosmetics (on sale!)
- At Ulta
When it comes to foundation, I like It Cosmetics CC+ Cream with SPF 50+. It’s an Allure Best of Beauty Award winner and was developed by plastic surgeons. The “CC” stands for “color correcting.” It’s a multitasking combination of a full-coverage foundation, hydrating anti-aging serum, and SPF 50+ physical sunscreen. All that aside, I like that it covers skin imperfections, giving hydrating, flawless coverage that won’t crease or crack. People tell me all the time that I have great skin, but honestly, it’s this foundation!
- At Amazon
- At ItCosmetics
- At Nordstrom
- At Sephora
- At Ulta (Right now, purchase any IT Cosmetics Liquid Foundation and get a Foundation Powder for FREE at Ulta!)
3. Applying Undereye Concealer in a Line
Once again, I learned this one from Bebe Tran, the makeup artist who used to do my makeup for some of my photoshoots. (Once I did a professional makeup lesson with her and felt more equipped to do my own!)
If you’re applying concealer with the swipe-in-a-line method, you’re doing it wrong. The correct way? First, moisturize your undereye area well. Next, use primer on your entire face (including the undereye area). Follow the primer up with your foundation. Then apply a hydrating concealer (I like Tarte Shape Tape Concealer) in a V-shape under your eye. This makes your face look fuller and more youthful by highlighting the front of your face. Blend well!
I’ve tried so many concealers! Have you? Finally, I asked for concealer recommendations in my influencer Facebook group. The beauty bloggers weighed in, and they loved Tarte Shape Tape Concealer. One tube of the full-coverage formula is sold every 12 seconds!
I started using it and haven’t looked back! It blends like a dream, hydrates (thanks to shea and mango seed butter), and doubles as a highlighter to bring out all of your best features. What’s more, the shade range is impressive and one of the best I’ve seen for a concealer. It has 30 true-to-skin shades to choose from. It’s sold exclusively at Ulta.
4. Putting Blush in the Wrong Spot
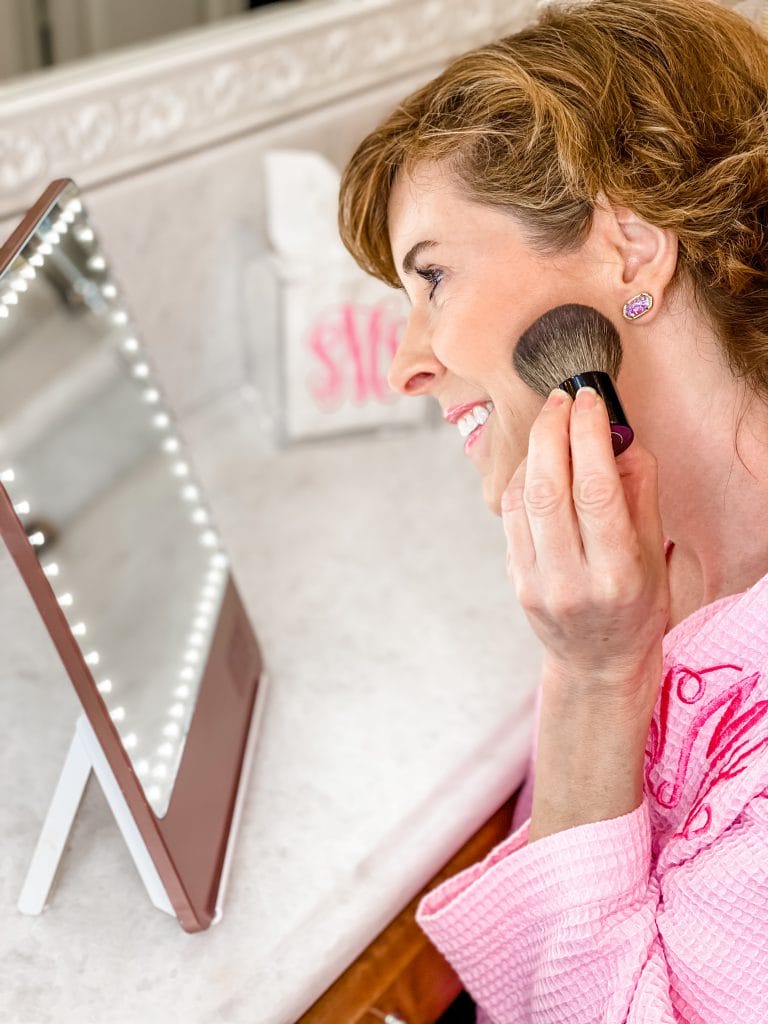
You’ve probably always heard that you should apply blush by smiling, putting it on the apples of your cheeks, and then swiping it outward toward your temples. That was great advice when we were younger with perky, full cheekbones! Unfortunately, cheekbones lose volume with age, and if you continue to follow that advice with your midlife makeup, once you stop smiling, your blush will end up somewhere near your nasolabial folds or the corners of your mouth. (If you don’t believe me, try it in the mirror!)
Instead, forget about the “apple” rule, and apply your blush higher up—actually on your cheekbones. I’ve tried lots of blushes over the years. Most of them fade out over time. My favorite blush is Chanel Joues Contraste Blush. It’s not cheap, but it’s highly pigmented, so a little goes a long way, and it doesn’t fade out over the course of the day. It comes in multiple shades. I’ve had the same two compacts (one called Rose Petale that is pinker and one called Malice that is more coral) for nearly five years!

5. Not Contouring and Highlighting
I’m going to give it to you straight up: As we age, we lose volume, and our faces can start to sag. Contouring and highlighting can make this less obvious. Contouring creates the illusion of structure and lift. It makes your cheekbones and jawline appear more defined. Highlighting, well, attracts light, creating the illusion of brightness and lift, providing a dewy, lit-from-within look.

If contouring and highlighting seem kind of intimidating to you, just remember this basic principle: Use the shadow created by contouring to make areas of your face (and neck) recede. Use highlighter for the areas of your face that you want to draw attention to and emphasize. It’s about embracing your natural face shape and giving yourself realistic-looking depth and dimension.

Contouring
When it comes to contouring, remember that you want to use it in areas you want to deemphasize. As a woman over 50, what you want to do at a minimum is to contour under your cheekbones and just under your jawline. Here’s how to do it:
- Apply foundation.
- Use a fluffy brush that will diffuse the product while you sculpt.
- Start right underneath your cheekbones to create depth. Use sweeping motions with your brush to blend out any harsh lines and make the contouring look more natural.
- Move on to the area just under your jawline and work from one ear to the other, using a circular motion. (This will give the illusion of a firmer jawline and minimize any perception of a double chin.)
- Add more to other parts of your face that you want to deemphasize—if you want. For example, if your face is wider than you’d like, you can add a little along your hairline. If your face is narrow like mine, don’t do that!
- Remember that it’s about embracing your natural face shape and giving yourself realistic-looking depth and dimension. It’s your face, so you make the call!
- Whatever you do, use a light hand (you can always add more!) and blend.
For contouring, I like Benefit’s Hoola Matte Bronzer. (BTW, never use shimmery contour.) It’s an award winner and comes in four shades. I’m fair, so I mix the Natural Bronze and Hoola Lite Natural Bronze for my perfect contour shade.
If you’d like something creamier, use a contouring stick, like the classic Chubby Stick from Clinique. It’s a good option if your skin is very dry, and powder contour is a no-go for you.
Highlighting

If you’re a woman over 50, at the very least, you want to use a highlighter in these spots:
- On your brow bone
- At the inside corner of your eye
- Along the very top of your cheekbones

Monogrammed Pink Waffle Robe | Pink Opal Illusion Earrings | LED Makeup Mirror | Acrylic Tissue Box | Charlotte Tilbury’s Hollywood Flawless Finish (shade 2) | Hourglass Veil Mineral Primer | Chubby Stick from Clinique | City Lips Plumping Lip Gloss (Sun Diego)
The thing to watch out for with highlighters is that they can be too shimmery! You don’t want that! I’ve tried a bunch, and for the past year, I’ve been using Charlotte Tilbury’s Hollywood Flawless Finish (shade 2). It’s moisturizing and provides more of a glow than a “highlight,” making your skin look dewy and illuminated right where you want it to! (It’s kind of like those Instagram filters I’m so fond of using on my Stories!) You can read more about it, watch how-to videos, and see before and after photos on a variety of skin tones HERE.
- At Charlotte Tilbury
- At Nordstrom
- At Sephora
I use this black brush for blending my contour and this silver one for blending my highlighter. (I like having two different colors so I can grab the right one quickly!)
I hope this post was helpful. I’ve made plenty of midlife makeup mistakes, that’s for sure! I’m not a beauty blogger, but I’m so happy to share my honest opinions with you. I hope you’ve found them helpful!
Whether or not you incorporate any of these tips into your midlife makeup routine, I want you to remember that you are beautiful. Truly, I think midlife women are some of the most beautiful women I’ve ever seen. I love the lines and softness that tell the world we’ve loved well and smiled much. I think midlife makeup should be light-handed—and we should actually wear less, not more, as we age. But I think we should be strategic about our changing midlife makeup needs, which I’ve tried to share in this post.
I’d love your thoughts! Please leave me a comment and share your product recommendations, ideas, and opinions! I’d love them all!






















Wow!
So much good information! I need to check out these products, especially the primer, blush and Charlotte Tilbury’s Flawless Finish. I am definitely saving today’s post. The video is the icing on the cake as it ties everything together beautifully. Thank you for all you do.
Sweet Deb,
Thank you for your comment! I’m so happy the post was helpful to you! It was fun to write and share. I’m grateful for your kind words!
xoxo
Suzy
Veil Primer states that it is for acne prone skin. Is there different formulas and is that really an important part of formula? Dealing with old dry skin, always been dry but this really giving me a challenge.
Michelle,
What? I was not aware that they stated that! My skin is just like yours – old and dry. It’s perfect for my skin. If you’re u sure, maybe consider ordering from Nordstrom, where they have free shipping/returns. (Yes even on cosmetics!)
I don’t think you’llwant to return it though! It’s awesome!
xoxo
Suzy
Thank you so very much for this post. I just finished reading your post about skincare ingredients and I asked on Instagram if you had also done an entry on makeup. I came back here to look around some more and here it is. The exact information I’ve been looking for! I turned 50 in December and knew I needed to change things up. I just didn’t know where to start. This is so helpful. I’m going to look into each suggestion in greater detail tomorrow and click on every link. I want to read it ALL. I’m going to check out your YouTube videos as well. You are appreciated Suzy! Thank you!
Denise,
I’m so happy you found it helpful! Thank you for taking the time to let me know!
More coming this week about skincare! Stay tuned!
xoxo
Suzy